How to Use Chemical Peels
Instructions for the safe use of at-home chemical peels |
Chemical peels are an effective way to treat sun damage, marks left behind from acne, and dull skin. They can be quite expensive to get done at a spa or doctor's office, so more and more people are turning to at-home chemical peel kits.
At-home chemical peels are not that different from professional chemical peels, but they do have their risks. After all, there is no one watching over your skin during the peel to monitor its progress. However, learning how to properly use the peels, using quality peels from reputable sources, understanding what to expect, and being aware of potential side effects will increase your chances of getting good at-home peel results for less than half the price of a professional one. Keep reading to learn how to safely give yourself a chemical peel in the comforts of your own home!
Where to buy chemical peels
Before you can give yourself a chemical peel, you first have to get your hands on one. Many online retailers sell chemical peel solutions, either alone or as a kit, in a variety of strengths and percentages. You may be able to purchase take-home kits from spas or dermatologist offices, but they will usually recommend getting the peel done there instead of doing it yourself. There are also many different types of chemical peels and the one you use will depend on what kind of results you want and what you are willing to go through in terms of pain and downtime. Check this chart for a comparison of the different chemical peels and what they treat to help you decide which one suits you best.
Most places also sell a trial size peel. I recommend purchasing a sample to test on your skin before buying the full size product. You never know if your skin will hate a certain acid or if a peel will be too weak for your skin, so it's better to be safe than sorry.
At any rate, make sure you purchase your peel from a reputable company with good product reviews. The company you purchase your peel from should also provide you with detailed instructions on how to use the peel. Aside from the quality of the chemical peel, customer service is another important deciding factor. You want to make sure the company will be there to help answer any questions you have about their peel and not flake on you when you need them most.
Before using the peel
If you are using any prescription products (like Differin, Retin-A, etc) discontinue their use 3-4 days before and after glycolic acid and lactic acid peels. Discontinue their use for 5 days before and 10 days after TCA peels. Sometimes, it’s also helpful to use an AHA product or retinoid nightly for two weeks before a chemical peel to get a more even peel. However, it's best to do this after your very first peel so you can gauge your skin's reaction.
If you are using chemical peels for the first time, use the lowest concentration peel (i.e. 30% lactic acid, 30% glycolic acid, and 8% TCA) and gradually move up to stronger peels as your skin gets used to them. Don't start out with too strong of a peel, thinking you will get better results for your money. You will just end up burning your skin! Your skin needs time to adjust to chemical peels, so gradually increasing the strength of a peel as your skin acclimates is the safest way to get effective at-home peel results.
You also generally do a peel every 3 weeks. Lighter peels like 30% lactic acid and glycolic peels can be safely done every two weeks. Deeper peels like TCA peels are best done only once a month at the maximum.
1-2 days before you use the peel, start washing with a soap-free cleanser (a cleanser without sodium lauryl sulfate or sodium laureth sulfate). This will ensure that the peel penetrates your skin effectively. All acid peels work best when skin hasn't been cleansed with overly alkaline products.
Depending on the type of chemical peel you are going to do, you might want to clear your schedule for a couple of days so you can sufficiently recover from the peel without having to be in public with a red and sensitive face. How many days of downtime you will need will depend on the kind of peel you are getting, so check the instructions that come with the peel you buy.
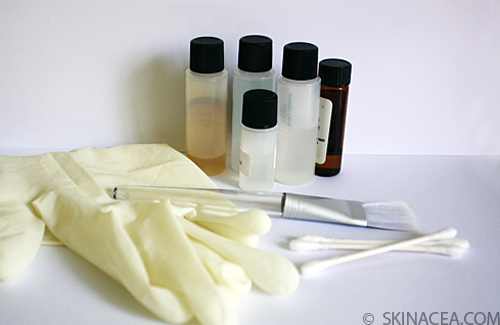
Make sure you have all the products you will need for post-peel care (see below) before you do the peel. That way you won't have to run out to get something when your skin is sensitive from the peel.
Spot testing the peel
Before you give yourself a full-face chemical peel, do a spot test. This patch test is very important because it helps you know how your skin will react to the peel, how long to leave the acid on your skin, or whether the acid is too strong before you actually use the solution on your entire face. You can take a risk and skip the spot test, but if your skin doesn’t agree with the acid, you will have to deal with the consequences on your whole face instead of on a tiny patch of skin.
To give yourself a spot test, prep your face like you would for a full-face peel (see below) and apply some peel solution on the skin below your ear along your jaw line (about an inch in diameter). If you are doing the peel on your hands, patch test your hands. If you are going to do the peel on your neck, patch test your neck. I usually apply peels with a q-tip because using your fingers can cause the skin on your fingers to peel as well.
You can leave the spot test on for one minute (or longer if you can tolerate it) before washing it off with water. The spot test will tell how long you should leave on the acid during your full-face peel. For example, if you left the spot test on for 5 minutes and it didn’t feel like anything, then it would probably be safe to assume that you can leave the peel on your entire face for 5 minutes as well. But let’s say that after 2 minutes, the spot test area started to burn. If that’s the case, then you should probably do the full-face peel for only one minute. Spot testing is the best way to tell how long you should leave the peel on your skin.
After 24 hours (wait 48 hours if spot testing a TCA peel), if the spot tested skin seems okay, proceed with the full-face peel, following the directions for use precisely. If your spot tested skin is very itchy or red or gets raised bumps, do not put the peel on your skin as you are probably experiencing an allergic reaction. If this is the case, keep your skin covered with polysporin or cortisone cream and avoid using the acid in the future.
How to give yourself a chemical peel
To give yourself a chemical peel, wash your face with a soap free cleanser and thoroughly dry your skin. Apply some sort of prep solution to remove any remaining surface skin oils and prime your skin for the peel. Most at-home chemical peel kits come with a prep solution, but if you run out or choose not to re-purchase the product, you can prep your skin with Sea Breeze astringent, witch hazel, or even diluted rubbing alcohol.
After the prep solution dries, liberally apply the peel to your skin using a small brush or Q-tip. Avoid the sensitive areas of your face around your eyes, nostrils, and lip corners. You can also apply petroleum jelly on these areas to prevent any acid from getting into them, as you should do with TCA peels.
If this is your first time using the chemical peel, leave it on for one minute (or longer depending on your spot test results) before neutralizing with a neutralizing solution. Alternatively, you can neutralize the peel by washing with a basic cleanser or splashing with plain water. Follow up with a good moisturizer and sunscreen or stay out of the sun.
The peel will make your skin turn red and sting. The stronger the peel, the more it will burn. This is normal, but if it starts to make your skin frost or sting uncomfortably, neutralize the peel immediately, even if it's before the one minute mark.
You can leave the peel on longer than one minute if and only if your spot test went well. As you give yourself more peels, you can increase each subsequent peel time by one minute and start leaving the peel on your skin for longer periods of time.
After your skin adjusts to the peel, you can either start layering peels to make them stronger (applying one layer, waiting 5 minutes, and then applying a second layer) or start using peels with stronger concentrations. Even if you use the same type of chemical peel but just a stronger version of it, always spot test on your skin before doing a full-face peel.
Some people like to use strong peels right away because they want good results and don’t want to waste both time and peel solution by starting off with a “weak” one minute peel, but it really is better to start off slow. Would you rather start off slow and “waste” a peel or start off too strongly and permanently damage your skin? Slow and steady wins the race.
What to expect after a chemical peel
After you get a peel, your skin will be red for a few hours, maybe even the whole day. To ease this redness, you can use cooling products (i.e. aloe vera gel) or cooling masks or simply wrap your skin in a cold towel. What I like to do is stick my face in a cool-mist humidifier.
Your skin will also be a bit drier and you may physically flake or peel in certain places, especially if you did a TCA peel. If you do flake, don't pick at it! Let your skin peel naturally or you risk damaging it. You can help your skin a bit by applying moisturizer more frequently throughout the day and drinking extra water. You can even coat your skin with a thin layer of Vaseline or Aquaphor to ease any discomfort.
There is pretty little down time associated with glycolic and lactic acid peels. In fact, most people don’t peel at all unless the peel is very, very strong. TCA peels, on the other hand, are different and do require down time.
Whatever chemical peel you use, just be sure to moisturize well and avoid the sun like the plague or wear a good sunscreen at all times because the peel will make your skin more sensitive to the sun.
Always be patient with your skin. I tell myself that my skin didn’t get bad overnight, so it’s not going to get 100% better overnight either. Chemical peels take time to work and you will have to get multiple treatments before you start seeing your desired results. As long as you follow the above tips, you will be able to safely give yourself an at-home chemical peel that works.
Last updated: September 20, 2012
How to Get Rid of Dark Under Eye Circles
Back « How To's
Related articles:
- My Glycolic Acid Peel Experience
- Facial Procedures: Types of Chemical Peels
- Side Effects and Precautions for TCA Peels
- Wear Sunscreen the Right Way
- Product Recommendations: Healing Products
